Stretch marks. One of the many things on a mother’s mind during pregnancy.
Although it can seem somewhat of a vain thing to worry about while you are growing a human being, being a Mother of (almost) 4, I can certainly relate to wanting to hold on to some of your old self.
In the midst of my 4th pregnancy, and nearing the end, I can personally attest to the importance of maintaining what you can to feel confident and beautiful.
A lot in your body is changing and things you never thought of before are surfacing to your mind.
So whether it be vain or not, feeling good about yourself and your body during pregnancy is so important!
You achieve this by many things too.
Eating a healthy diet, taking your vitamins, getting enough sleep (if you can with all those mid-night pee breaks), exercising, and guarding your emotions.
One of my favorite ways to take care of myself during pregnancy is some good old fashioned self care which includes a lot of epsom salt baths and a healthy lather of moisturizer to keep my skin glowing and looking young.
So for each of my pregnancies, I have used this recipe to keep myself looking and feeling great – and the best part?
NO STRETCH MARKS!
With this simple recipe (which lasts me throughout my whole pregnancy and then some), I have maintained my pre-pregnant skin without a single tiger stripe running across my belly.
And now I am sharing it with you!
Sure, you could purchase some pre-made whipped body butter and save some time, but this recipe is so simple and easy and will save you money in the long run!
So let’s roll up our sleeves & get to work so you can have glowing pregnancy skin too!
Disclaimer: This Content is not intended to be a substitute for professional medical advice, diagnosis, or treatment. Always seek the advice of your physician or other qualified health provider with any questions you may have regarding a medical condition.
Affiliate links may be used in this post, so that means if you purchase anything through these links, we will get a small commission which helps keep this blog running. We only promote and share products that we personally use, trust, and love!
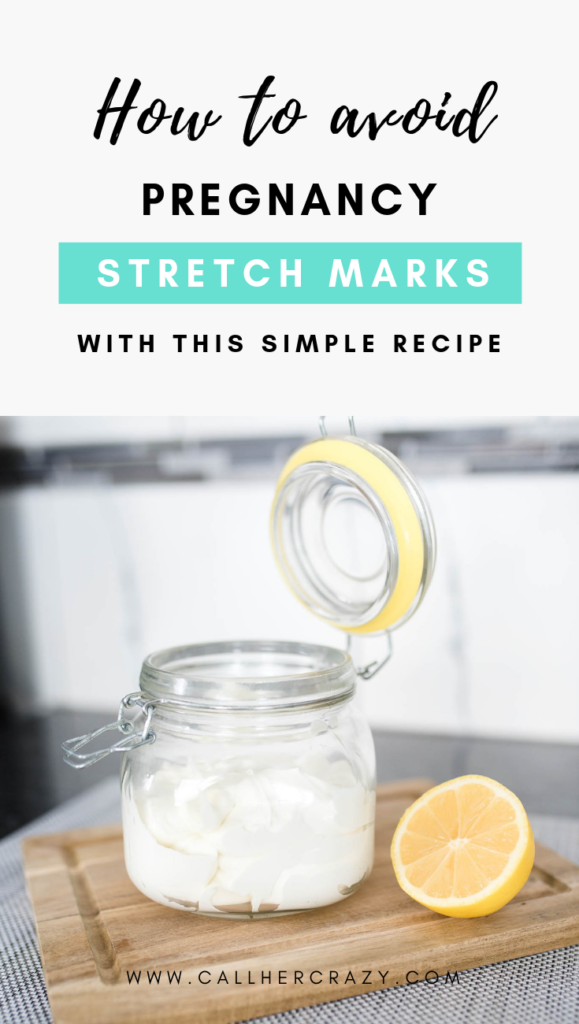
Ingredients
1/2 c Organic shea butter – I LOVE this brand
1/4 c Unrefined Coconut oil – best kind for consuming & and using topically
1/4 c Sweet almond oil – always my go-to
20-25 drops of Essential oils* (optional) – I prefer uplifting citrus blends
1 Glass container for storage – I like the spring lids for easier opening
*As essential oils are extremely concentrated, take caution when choosing an oil to add to your butter to avoid any side effects or skin reactions
Directions
On the stove, melt the shea butter, coconut oil, and almond oil on low heat until it turns into liquid.
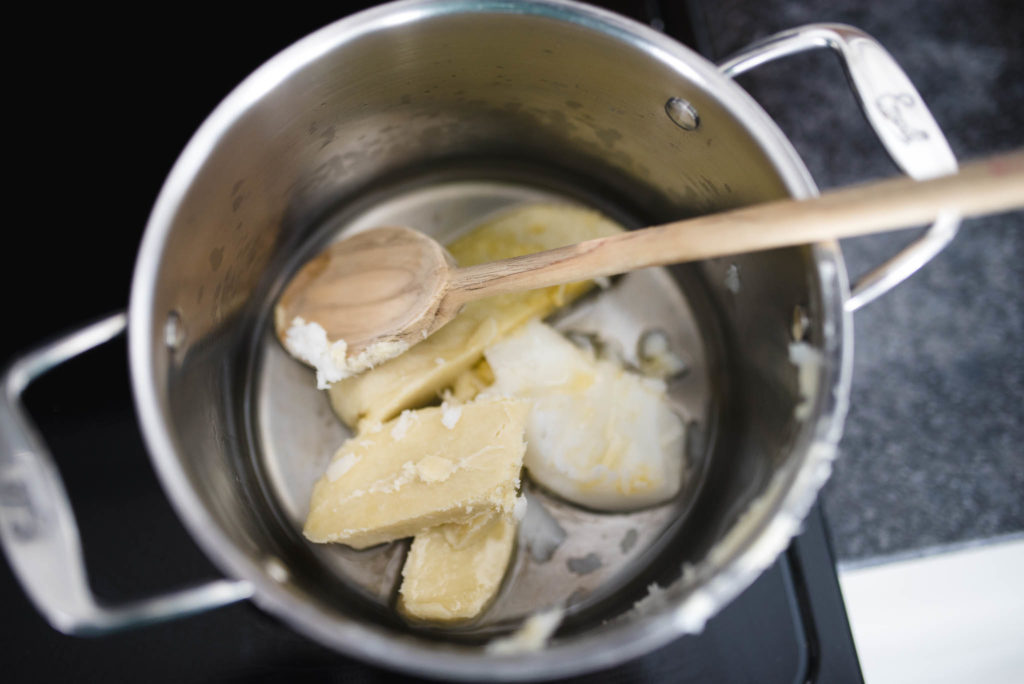
Stir, stir, stir until all of the solids from the butters are completely melted. Once done, it should have a slight yellow tone and be completely transparent.
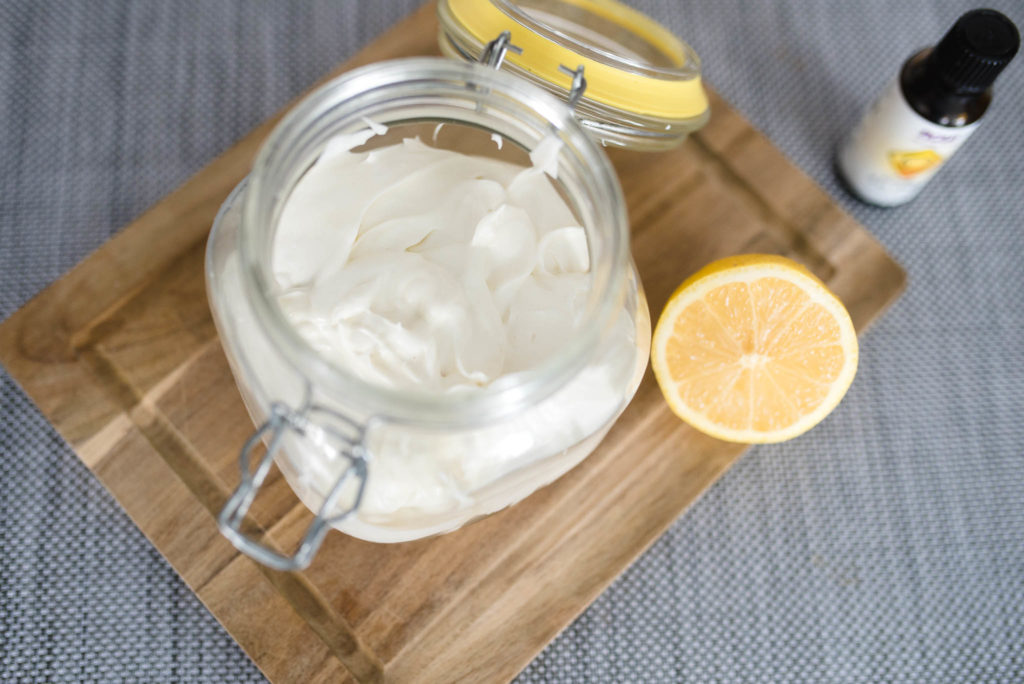
Now you can stir in your preferred essential oils to make it smell nice!
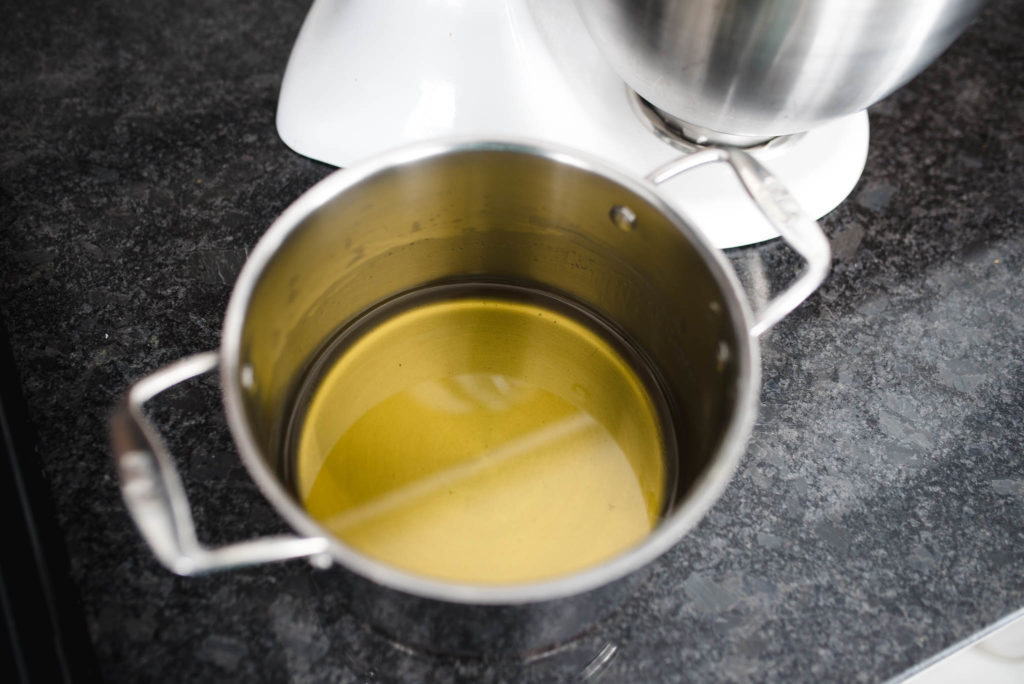
Next, you need to let the mixture set until it firms up a bit.
The consistency you are going for is butter at room temperature – soft, but pliable.
Note: the butter will NOT whip up if it’s not set fully, so make sure you don’t skip this part!
It can take some time to set up, so if you’d like to speed up the process, stick it in the freezer for about 15 minutes and then check on it. Once it gets to a certain point, it can solidify really fast, so make sure you keep a watchful eye if you do this.
If for some reason it hardens too much, you can just melt it again and start over – no biggie.
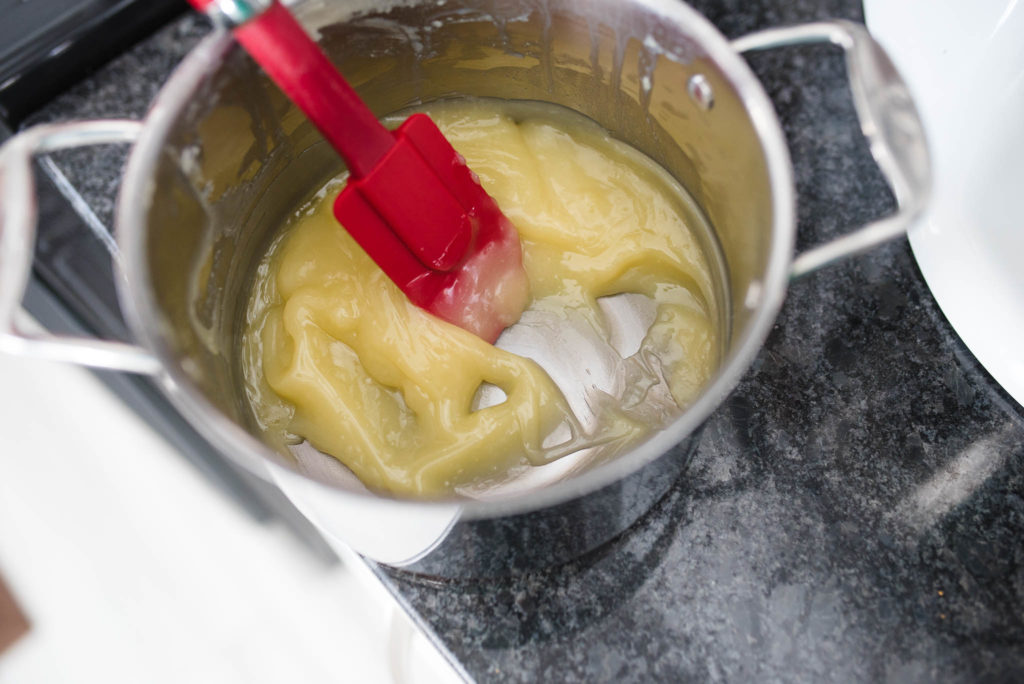
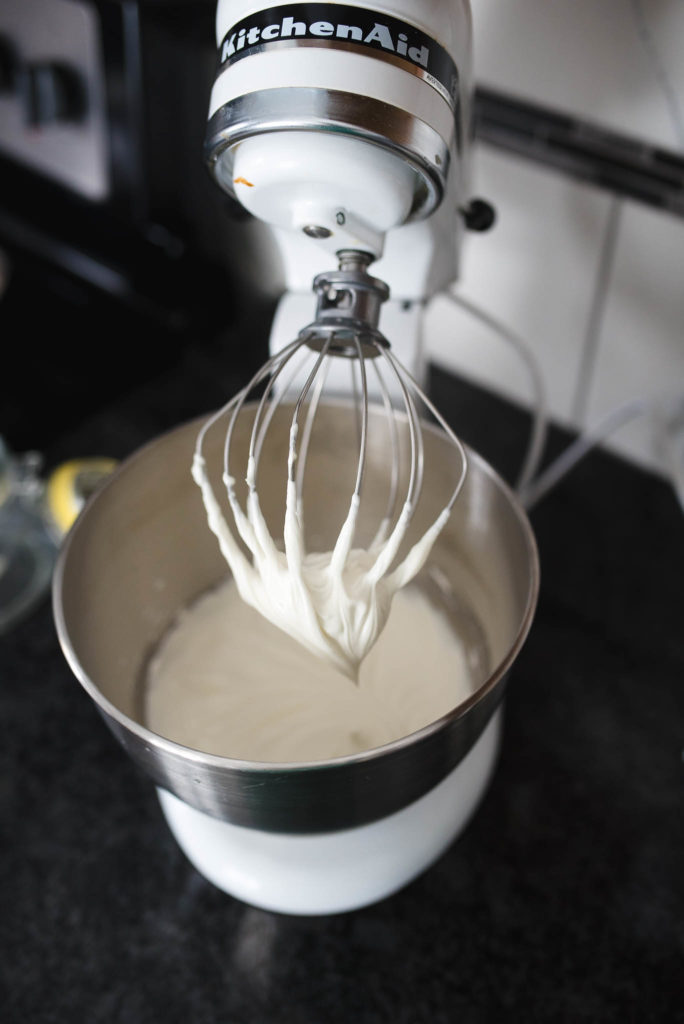
Now it’s ready to be whipped!
Transfer it over to another bowl or stand mixer (here’s a link to my favorite I’ve had for over 10 years!) and mix on medium speed.
This should only take a few minutes.
You’ll know it’s ready when it forms stiff peaks & turns white – much like whipped cream when it’s been whipped correctly.
Now it’s time to transfer!
At this point, the butter will harden up pretty fast, so make sure you transfer it over to your jar now before it stiffens up.
And voila!, you’ve got yourself a whole jar of body butter that should last you for 9 months.
Note: a little goes a long way! I like to apply this on my belly after I get out of the bath or shower when my skin is most pliable & it lasts ALL day.
Making this homemade whipped body butter is so easy and versatile – and it also makes great gifts!
Homemade products are always good and this belly butter seems very easy to create with these handy ingredients. Will definitely try it. Thanks a lot for sharing.
Have fun making it!
could you use olive oil instead of sweet almond? I have some that I infused with calendula and I think it would be so nice in this recipe.
try it out and let me know!